There’s a place I like to race at in St. Peter, MN called Shamrock RC Raceway. It’s an interesting setup because it’s a turf track set up outdoors in a hockey rink that would otherwise go unused in the summer. Rather than bring an insane extension cord to power my charger from the park restroom, I wanted to come up with a more portable (and green) charging solution.
So I put together this simple solar charging setup:
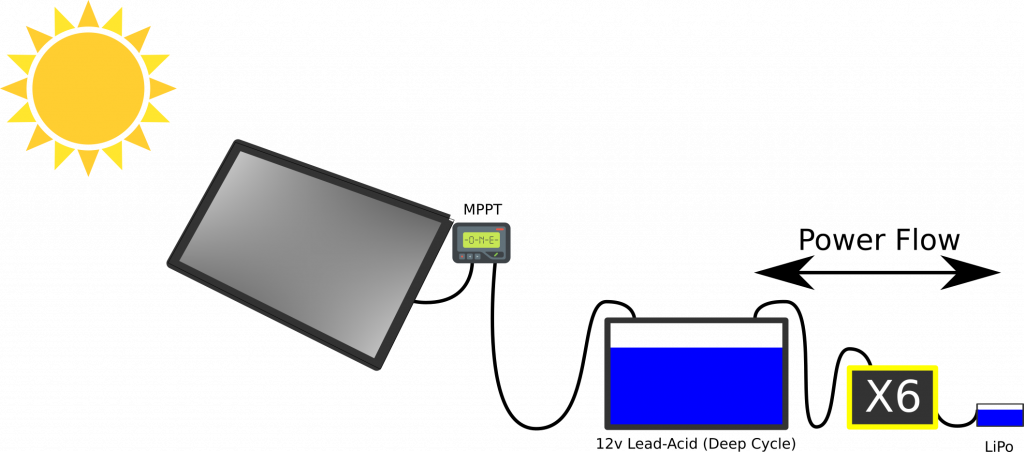
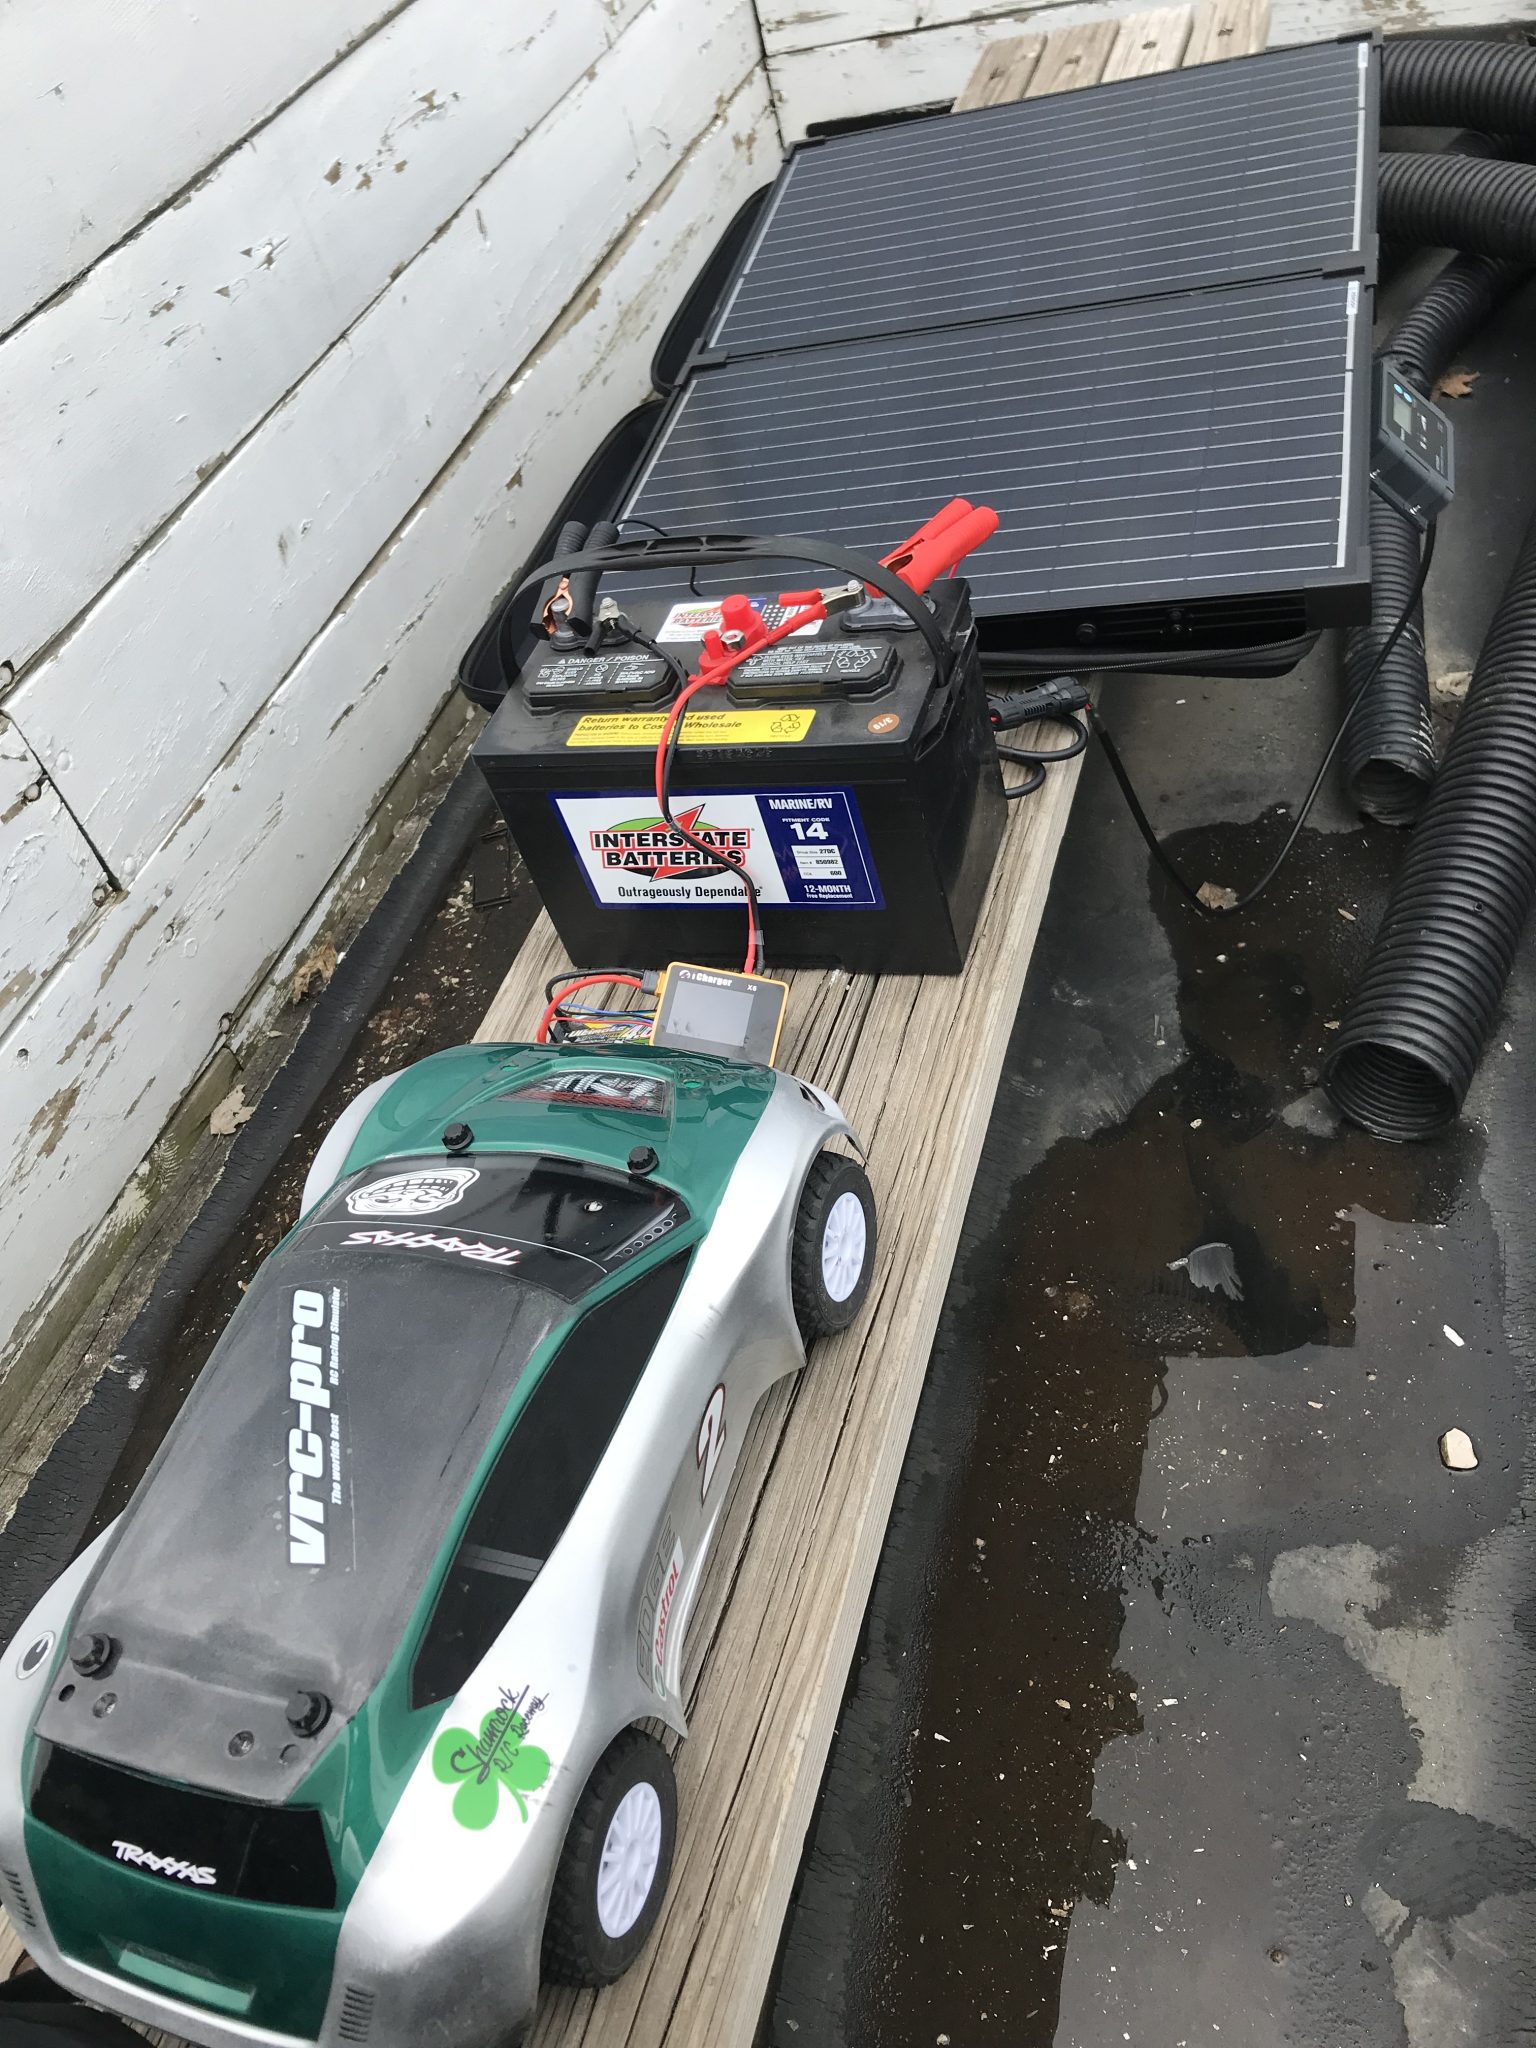
At the front end is a Renogy 100 watt portable solar panel and a MPPT controller. This model is more expensive (at $275) than the normal $1-per-watt deals you can get on just panels. But it folds nicely, comes in a carrying case, and includes a waterproof controller and all necessary wiring.
The panel turns sunlight into power, and the MPPT controller decides how much power goes to the battery. It has several settings for different 12-volt battery chemistries (Lithium Polymer, Lead Acid, AGM, etc.).
For my “energy sink” battery, I went with a tried-and-true Interstate group 27 deep cycle battery that I got from Costco for about $100. It’s got 160 minutes of reserve capacity, so figure about 67Ah at 12v. Pro-tip: the deep cycle batteries aren’t available at Costco in the winter here. You gotta get them in the spring when Minnesotans are bringing out their boats.
I call it a sink, and I drew it to look like one in the illustration because I like to think of the stored energy like water in a sink. Energy in the sink can be emptied to charge another battery, it can be refilled by the solar panel, and it can be refilled from another battery. I’ll show you how…
Regenerative charging
My favorite part about this setup is with the right charger, I can do regenerative discharging. I did my research and found a couple of chargers that can do fast discharging by reversing power flow and putting energy back into the input – the energy sink. The two chargers I’ve found that will work are the Turnigy Reactor and most Junsi iCharger models. I went with the iCharger X6 because it’s extremely portable and packs a powerful 30-amp punch.
Why do I want to do regenerative discharging? When I go racing I usually bring two batteries for every vehicle we’re going to race. I’ll use one during practice and charge the other for qualifying and racing. At the end of the day, usually a 5-8 minute practice, qualifying session, or race isn’t even close to getting the battery to its most stable resting (storage) voltage – 3.8v per cell.
A quick way I had been discharging was to use a AOKoda Cellmeter 8 to bring their voltage down to 3.8v per cell. It works incredibly fast because I can draw up to 150 watts of power by running three 50 watt incandescent bulbs. The power turns quickly into heat and light.
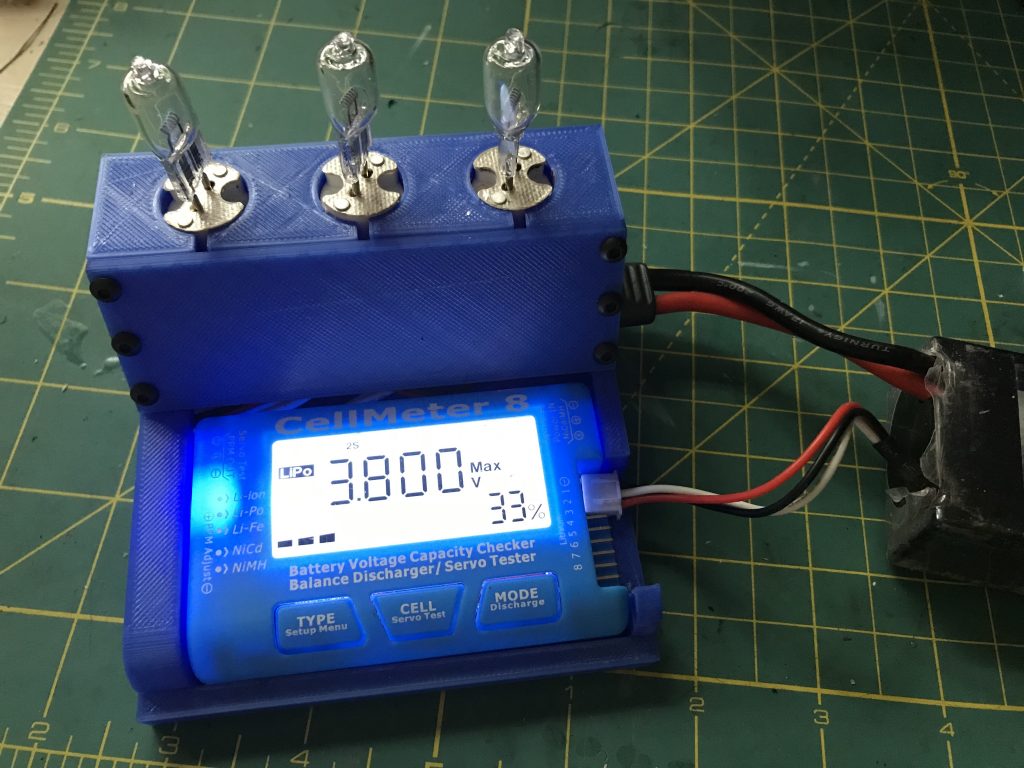
But why not recapture that energy instead? Regenerative charging allows you to put that energy back into an energy sink battery just as quickly.
X6 regenerative discharging setup
The X6 has 4 “input source profiles” that you can use to tell it whether it’s being powered from a normal power supply or a battery. You can give it parameters for how much power these sources can deliver and whether or not they are regenerative.
To set up the input sources, first get to the system menu by pushing and holding the nav wheel down from the home screen. Then you can go to the “Input & Power Limit” section.
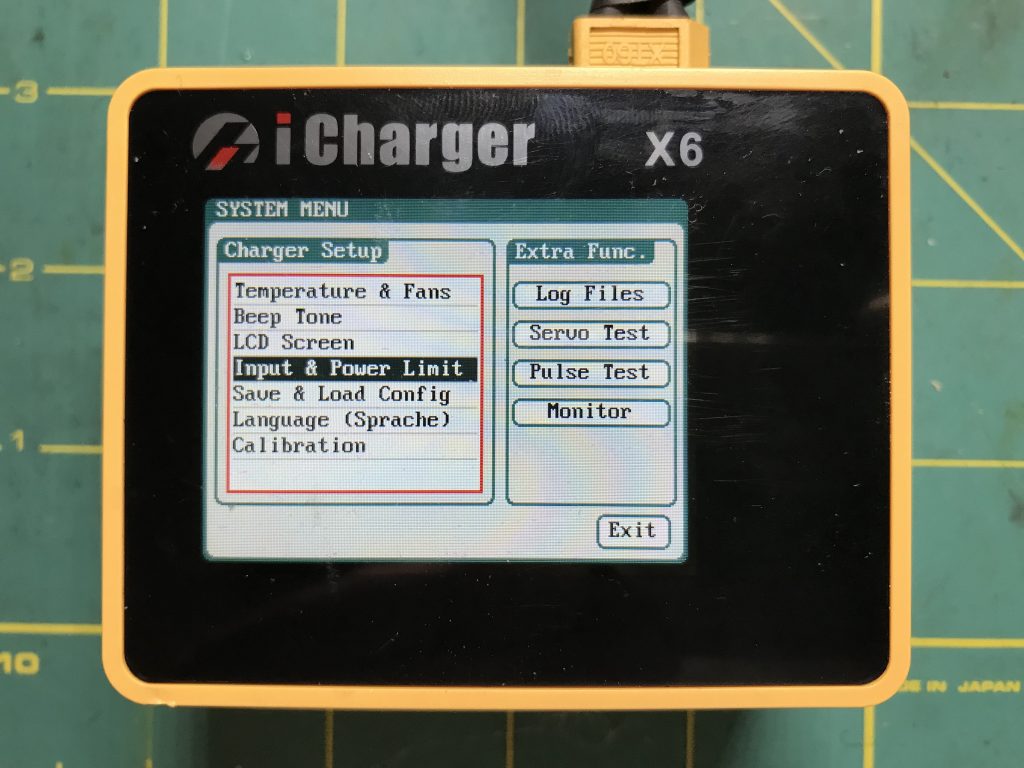
You then select one of the four available profiles you want to edit.
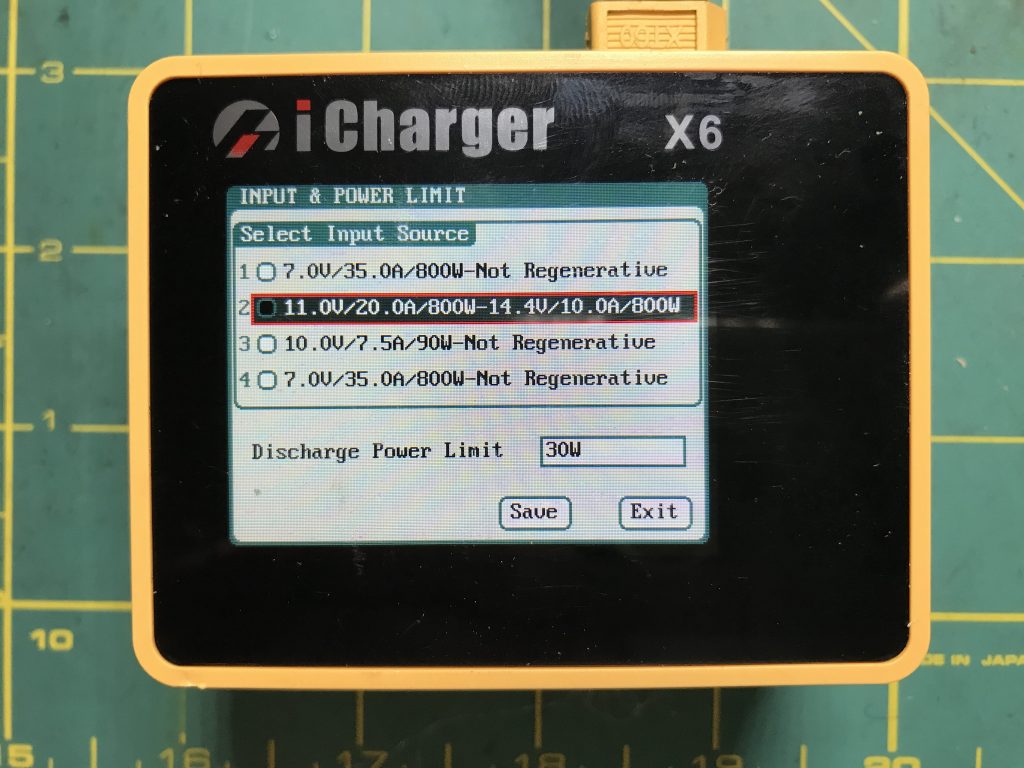
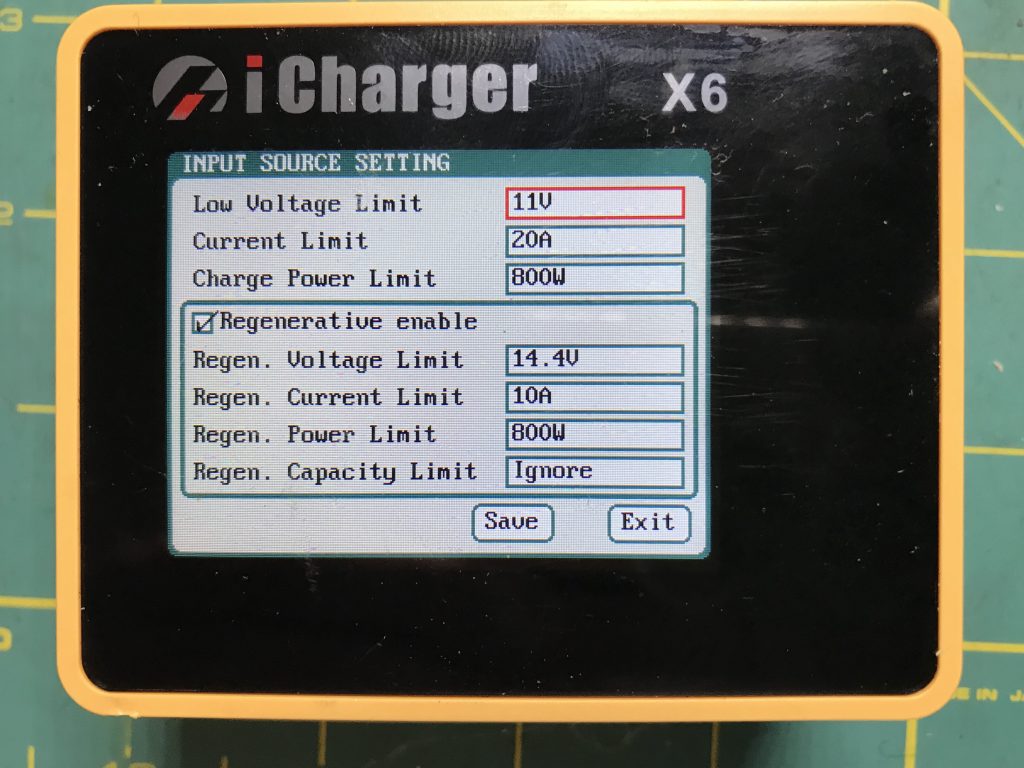
This is my setup when connected to the deep cycle battery. My Costco/Interstate battery has a reserve capacity of 160 minutes (at 25 amps). I set the max current to 20A so even if there’s no solar power input, I should get over 3 hours of charge time at 20 amps – but I’m never charging at that rate anyway.
Check the regenerative enable box to get those options. Here you need to know what the fully charged voltage you want to stop at and what the max charge rate is. This will vary whether you’re using lead acid, LiPo, LiFE and how many cells it has. Maybe you want to use something like my 6S lawn mower battery as the energy sink. Regardless of what you use, you need to know the max charge rate and voltage.
Based on my 67Ah deep cycle battery, charging it at 10 amps is a 0.15C charge, or 15% of its capacity. That’s between the recommended 10-30% of capacity rates. Best to be conservative here.
Discharge vs. Storage Programs
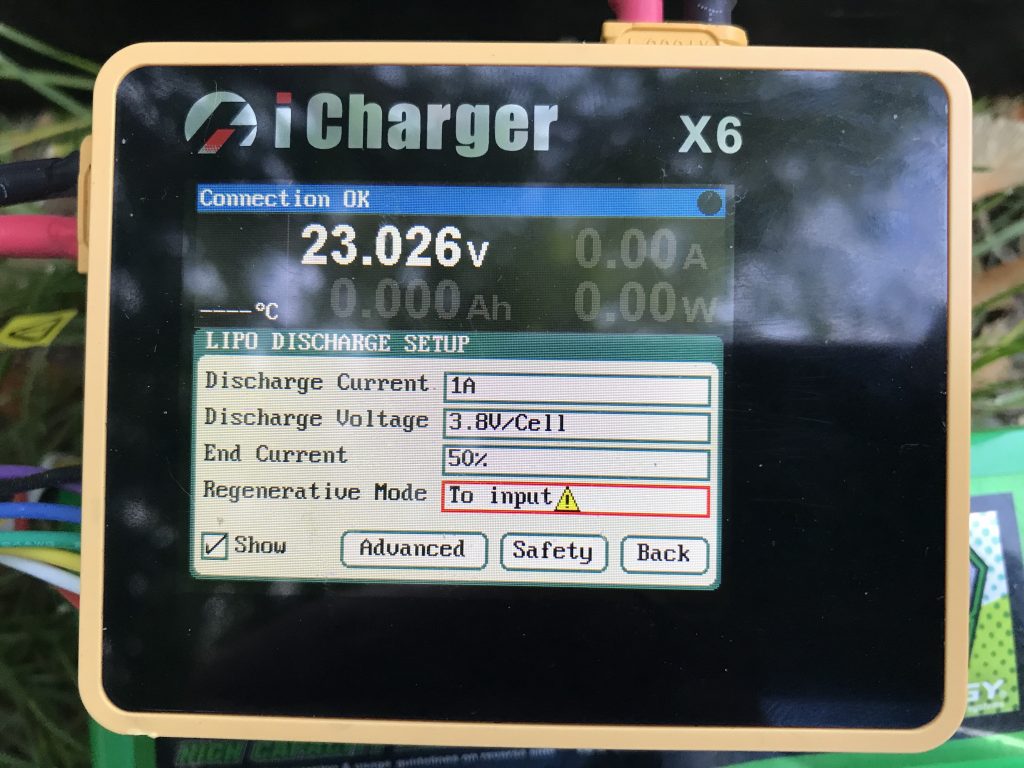
Once regenerative charging is enabled on the input source, we need to also enable it on the discharge setting for your charging profile(s).
Why Discharge and not Storage? Because storage is a smart mode that will either charge or discharge cells based on whether or not they’re above or below your target voltage of 3.8v. As long as all of your cells are above 3.8v, you can use discharge mode and set the discharge voltage to 3.8v instead of the default 3.5v. The charger can still do some balancing of the cells on the way down to the target voltage – enable it in the “Advanced” section of this screen.
There are several safety measures built in to make sure you don’t send power back to something that can’t accept it. The iCharger will warn you here with a yellow exclamation.
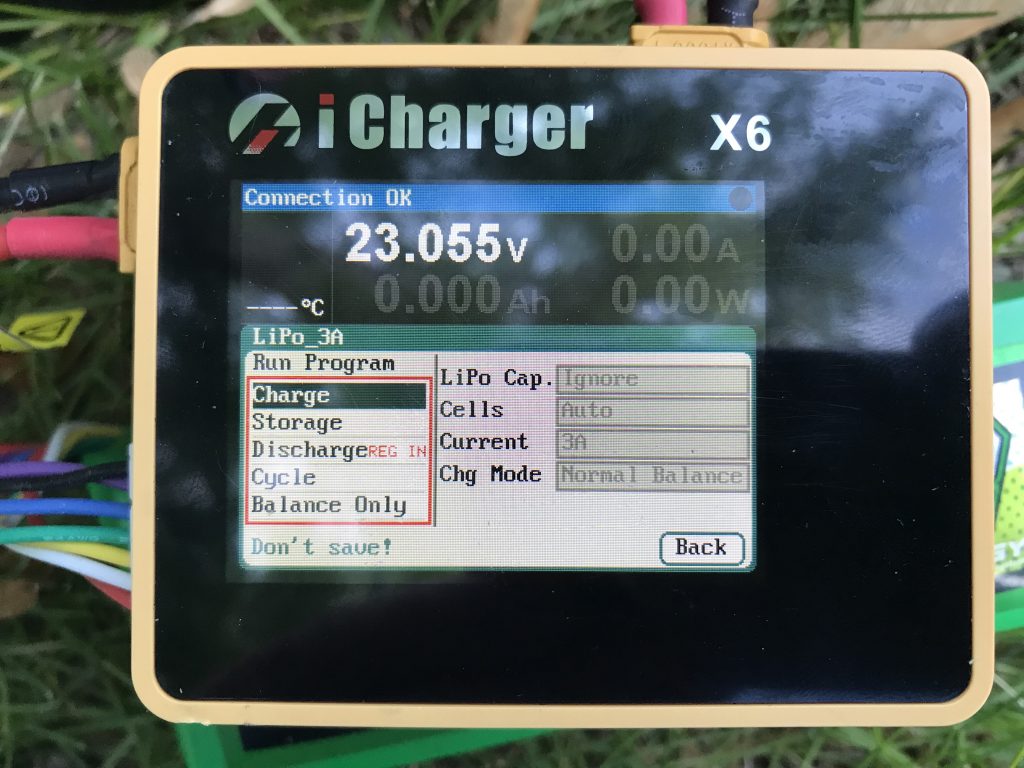
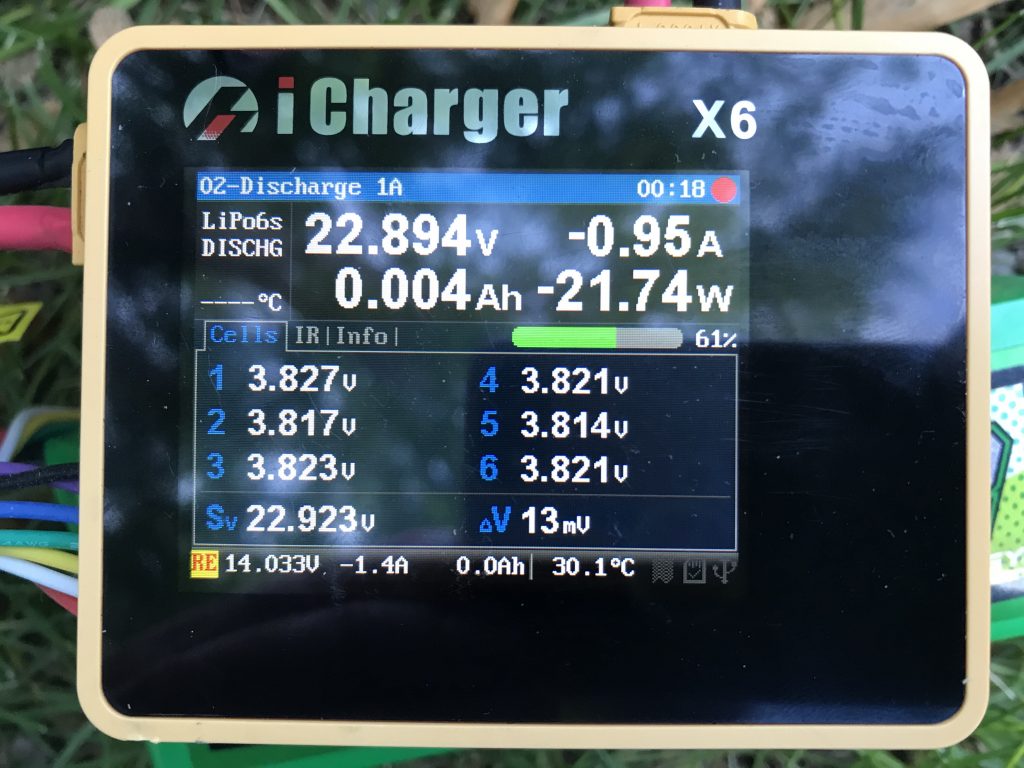
Once you’ve enabled Regenerative Mode, when you go to run the program, Discharge will have “REG IN” in red next to it.
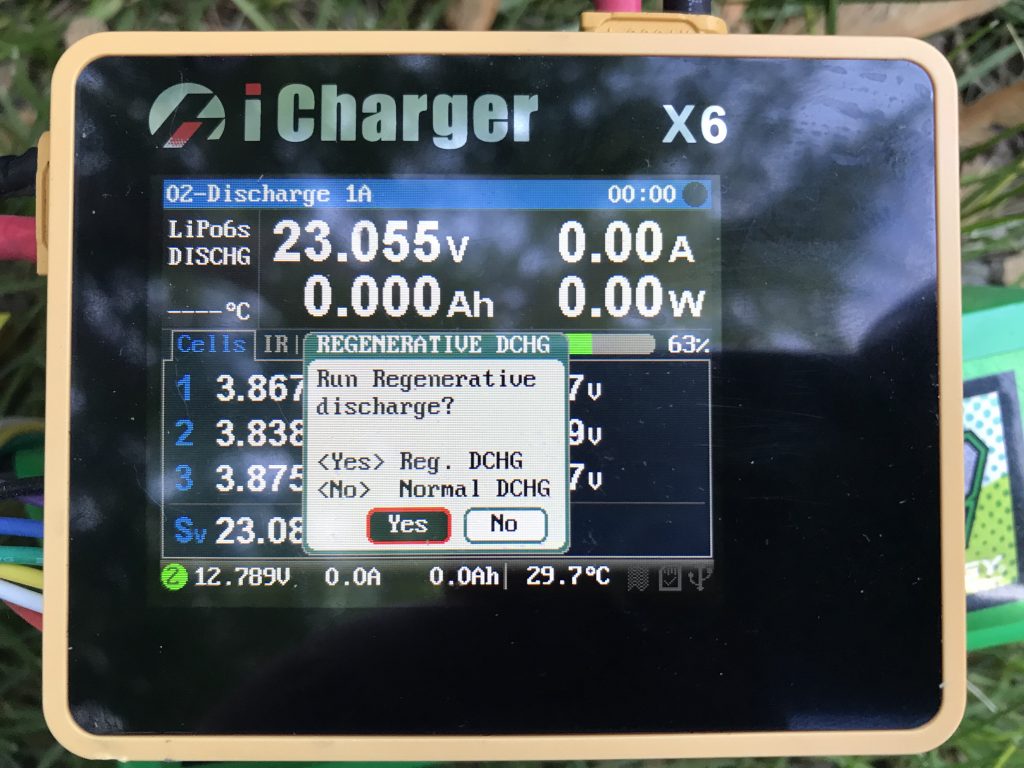
One last safety feature – when you select discharge it will give you another confirmation on whether or not you want to do a regenerative or normal discharge.
Now you’re taking energy out of your RC battery and putting it back into the source energy sink! In the lower left you’ll see RE in yellow & red with the voltage and current. No wasted energy to light or heat – just put it back where it came from 😎
Wireless Charging in Action
Here’s my setup at the track. On a sunny day I’ve seen the MPPT controller send out 6.0 amps to the battery. At 14v that’s about 85 watts. Not bad. Without taking away any battery charge from the energy sink, I can charge a 2S battery at 10A, and my 6S lawn mower battery at 3A.
Do you have any other green charging ideas? Let us know about setups you’ve built or seen in the comments.

[…] is a battery charger – but you might have one already. If not take a look at these iSDT and iCharger […]