I can’t say enough about pascallanger and others who have worked to put together the open source 4-in-1 multiprotocol module. It’s a collection of all of the transmitter protocols that are open source, or have been reverse engineered, compiled into one. Combined with the 4-in-1 module hardware, you can control a huge variety of models with different receivers and protocols with the same transmitter. And now you can get it as a ready to use module for $40.
With the 4-in-1 I’ve been able to fly:
- Inductrix (Tiny Whoop) bind-and-fly (DSM Protocol)
- Assault 100 (HiSky HT-8 Protocol)
- FT Flyer with FlySky receiver
- FT Snowball with FlySky receiver
- FT Tiny Trainer with HobbyKing HK-T6A-V2 receiver (FlySky protocol)
- XK K110 bind-and-fly micro-heli (Futaba SFHSS Protocol)
It will work with several other protocols including SLT for AnyLink models and RealFlight simulator.
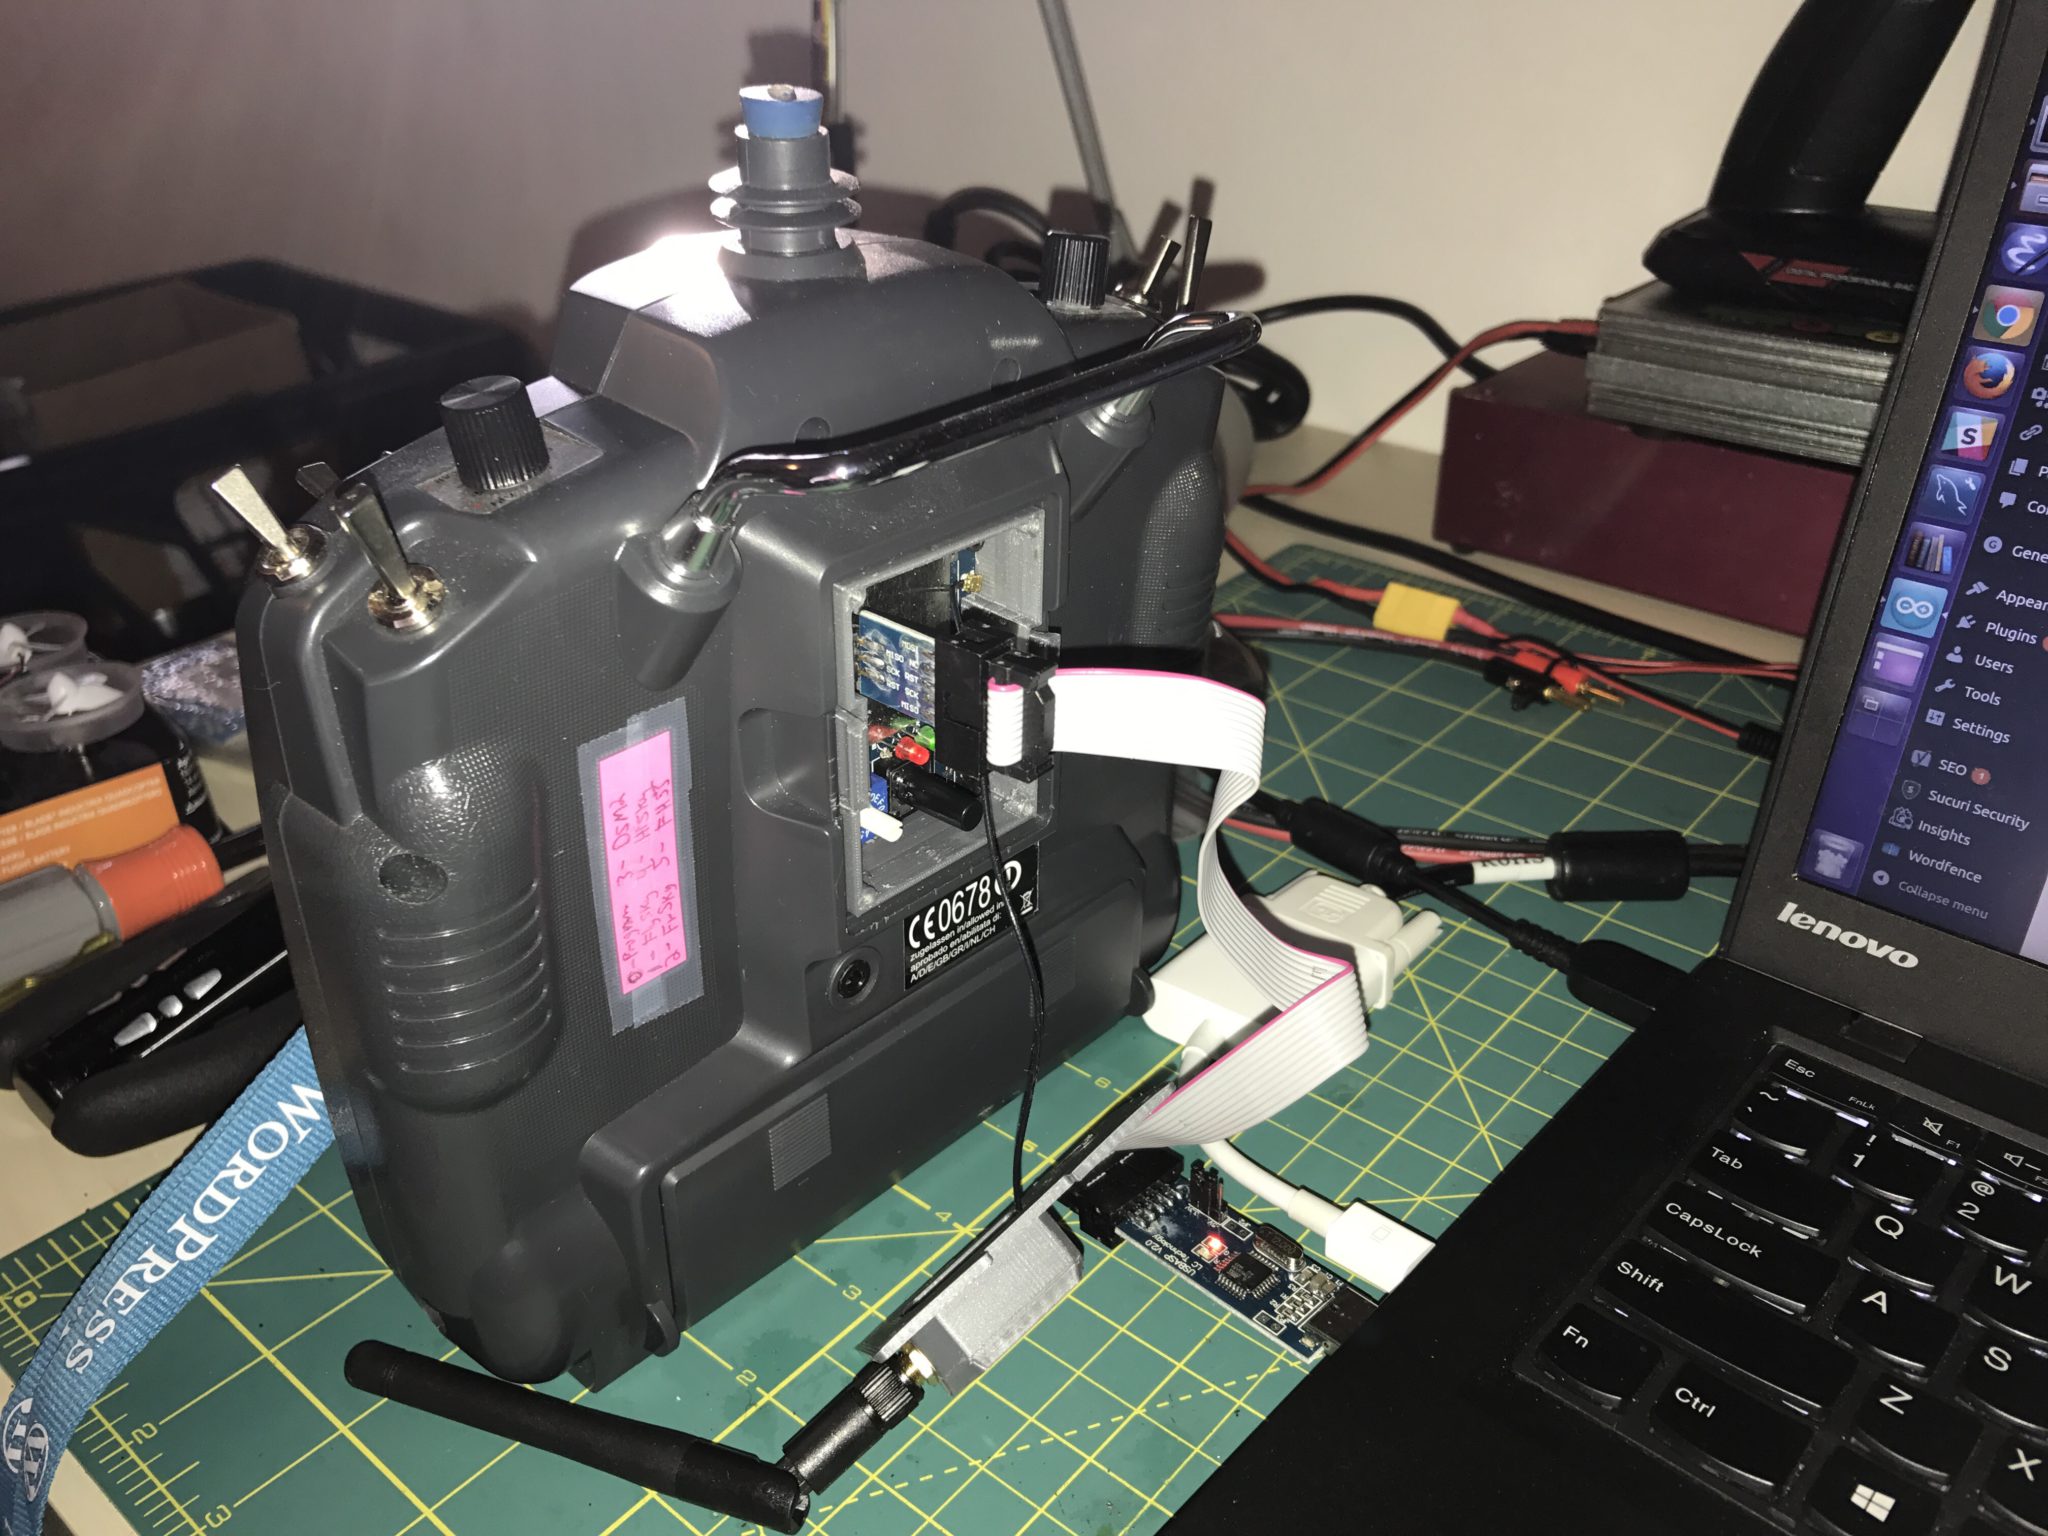
For my particular installation I had my cousin 3D-print this case off thingverse. It works well, but I did some customizations to the case that you might find useful as well. There are several different 3D-printed designs out there, so you might want to shop around before you print.
Hardware Customization
The case is pretty good. I did have to sand it a bit to get it to fit in my Turnigy 9x module bay.
After putting the module into the case and using it for a while, I realized that the module pins from the radio weren’t fully seated into the module. The result was the module momentarily powering off with the slightest bump of the radio. Not a great experience while you’re flying.
To fix this, I took a dremel and cut the printed stand-offs in the case down by about half so the module would sit closer to the radio, and the pins would be fully inserted.
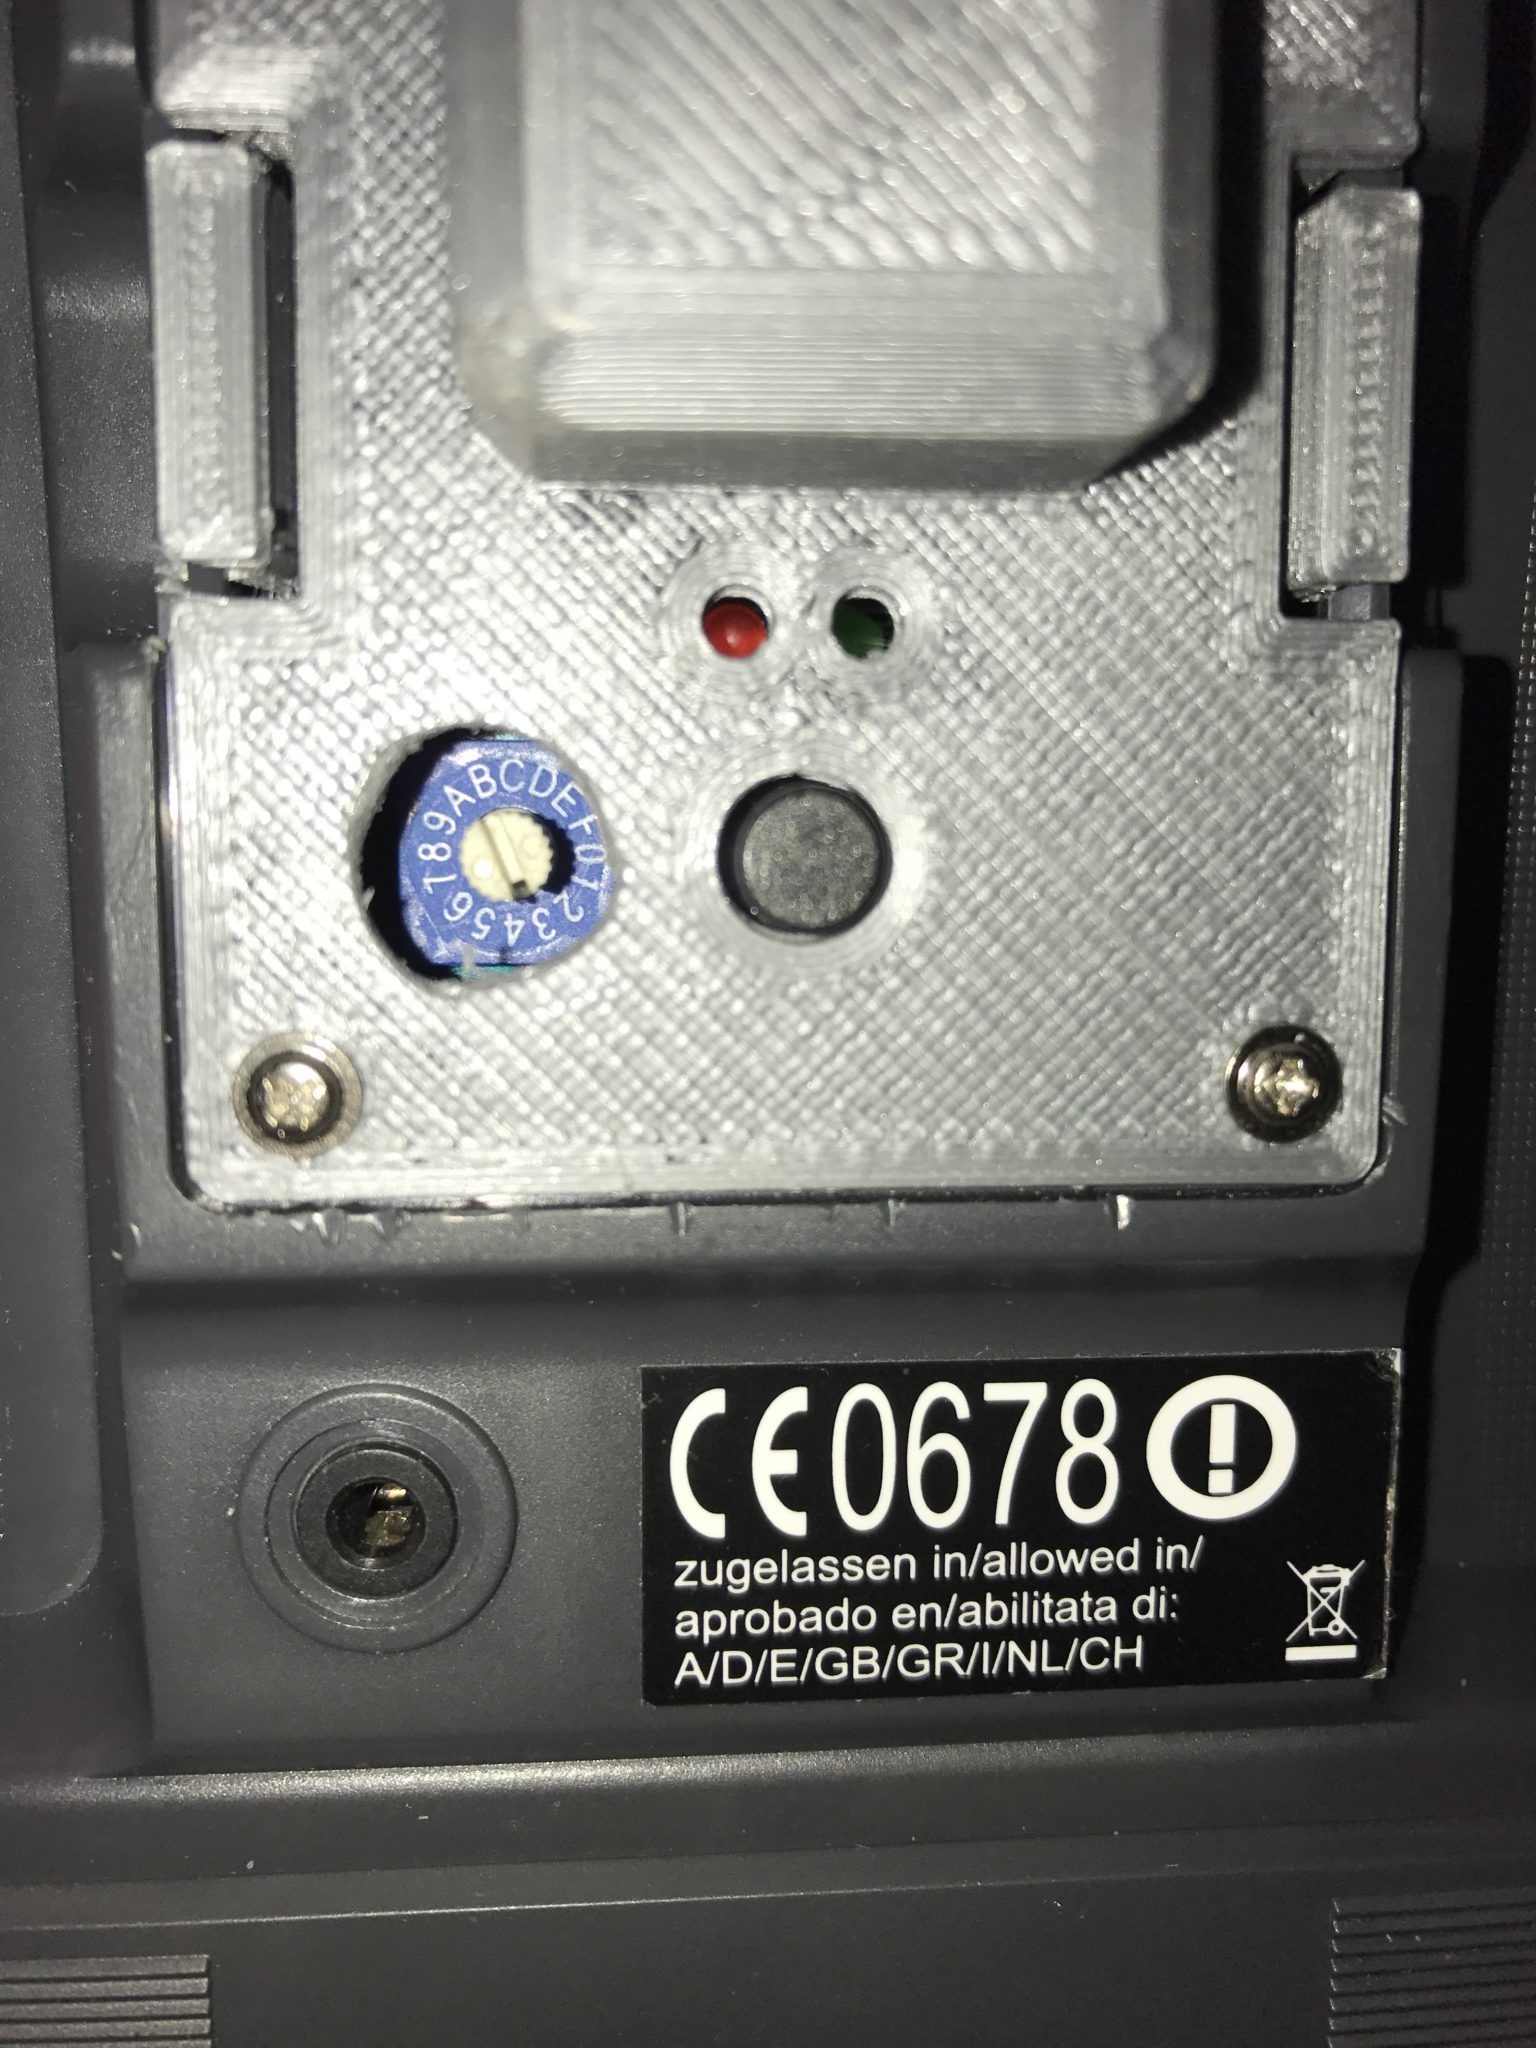
The last thing I changed on the module case is the size of the hole for the protocol selection. It’s only big enough to see the adjustment dial and not which of 16 positions the dial is set to. I drilled it out to be as large as the bind button hole, so you can peek into the case to see the setting. This was super helpful because I originally thought the “0” position was at 12 o’clock, but it is actually at 3 o’clock. Seeing it relieves a lot of confusion.

If I were to do it again, I’d probably start with this design. You’ll notice the hole for the bind button and the protocol selection dial are about the same size 🙂
Software Configuration
For software configuration, I made some adjustments for my particular models that you might find helpful.
As a general rule, whenever I update, I always check for a newer release on the project github page. If there’s a new release I check it out and then immediately copy the entire Modules directory into a custom folder for this release. Also the Arduino IDE wants the main .ino project file to be named the same as its parent folder, so remember to rename it accordingly as well. I do all this because I will only need to modify the _Config.h file and I want everything else to be the latest and greatest:
$ cd DIY-Multiprotocol-TX-Module
$ git pull
$ git checkout v1.1.6
$ cp -a Multiprotocol jrfoell-Multiprotocol-1.1.6
$ mv jrfoell-Multiprotocol-1.1.6/Multiprotocol.ino jrfoell-Multiprotocol-1.1.6/jrfoell-Multiprotocol-1.1.6.ino
The data structure PPM_Parameters PPM_prot in _Config.h is where all of the protocols (and subprotocols) are assigned to the dial. There is also an “Option” on most protocols that will allow you to make minor adjustments so the TX module protocol will play nice(r) with your particular receiver.
To get my Tiny Whoop to bind consistently on startup, I had to set the subprotocol to DSMX 22 (rather than the default DSM2 22):
// Dial    Protocol      Sub protocol RX_Num Power    Auto Bind     Option
/* 3 */    {MODE_DSM ,   DSMX_22 ,    0 ,    P_HIGH , NO_AUTOBIND , 6 }, // option=number of channels
To get my XK K110 helicopter to bind at all, I had to set the Option (a frequency adjustment in this case) to 50:
// Dial    Protocol      Sub protocol RX_Num Power    Auto Bind     Option
/* 5 */    {MODE_SFHSS , 0  ,         0 ,    P_HIGH , NO_AUTOBIND , 50 }
As you can see in the image, I also tape a little “cheat-sheet” to the back of my radio to indicate which protocol is at which position. Beats guessing when you’re at the field!


[…] is essentially the same as the DIY Multiprotocol transmitter that I already have, but with an STM32 chip. The chip upgrade has enough memory to hold all of the current protocols […]