I did this mod to my TC6.1 because it’s a dedicated VTA racer. To be honest, 99% of the people out there racing VTA are using 190mm touring car chassis’. However they’re all also running 200mm bodies on them, which can sometimes look a little weird with the wheels tucked way up underneath.
Many of the 200mm VTA bodies that we use today were created by HPI in the early 2000s before the USVTA series existed. They were originally intended to be used with their RS4 chassis which included settings for both 190mm touring car bodies (The chassis actually measured 180mm), and 200mm for their wider bodies. The rear vintage wheels and tires have an offset so the 200mm bodies don’t look too bad on a 190mm chassis. But a select few bodies like the ’70 Charger and ’68 Camaro have an extra-wide 210mm rear. This is when the wheels tucked under look a little silly. Let’s fix that…
Parts
- AE 31386 2mm bulkhead washers
- 18mm x 3mm BHCS (8 needed)
- Tamiya 54076 Wheel Axles x2
- Tamiya 51092 46mm Swing Shafts (or Tamiya 54078 44mm Swing Shafts) x 2
- Tamiya 53500 Cross Joints
- AE 31238 CVA Bone Blades and a #46 drill bit
- 3Racing 3RAC-WX127/LB 7mm Wheel Adapters
- Standard size (2mm x 10mm) wheel pins
On the TC6.1 there’s 3 places where the width can be adjusted:
- At the bulkhead using spacer washers
- At the hinge using the offset style for an extra millimeter
- At the hub using wheel spacers
Arm Spacing
I started by spacing out the arm mounts 2mm from the bulkheads using the AE Bulkhead Washers, and by switching to the offset arm mounts AE 31361 – which I believe will also work on a TC5 (you can see how I widened my TC5 as well). The offset arms give an extra 1mm of spacing.
Now’s when we’ll replace the stock 14mm button head hex screws with longer 18mm ones to accommodate the extra width.
Axle Spacing
I verified that the Tamiya axles were a drop-in replacement fit on the TC6 wheel hubs. Now it was just a matter of getting the right dog-bone length. The length listing on the swing shafts are always from the pin-to-pin on the dog-bone. The stock TC6.1 CVA bones are 45mm. The AE bones have a slightly smaller ball (and cross pin) where it meets the axle – so you can’t just mate the AE bone to the Tamiya axle. Best to switch the whole swing shaft assembly to Tamiya.
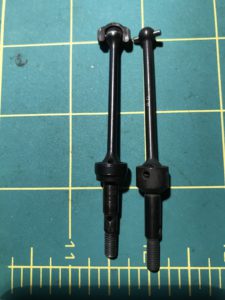
I started my axle fitment research with the Tamiya 53847 46mm assembly (not included in the list above). Here’s what it looks like side-by-side with the TC6.1 and Tamiya swing shafts with the pins lined up.
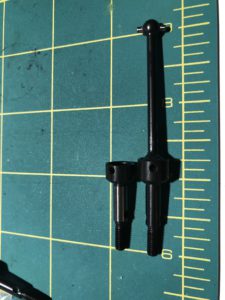
At this point you might be asking: why the heck would I want to switch from AE to Tamiya axle assemblies? Why not just add wider wheel adapters to the AE axles? Doing that is not easy. If you look at the difference between the AE and Tamiya axles, you might notice that the AE axle is 4mm, then it steps up to 5mm after the wheel adapter pin hole. The Tamiya one uses the otherwise universal 1/10 scale standard of being 4mm, then stepping up to 5mm before the wheel adapter pin hole. By switching to a Tamiya axle, you can run virtually any wheel hex out there… Except of course, Associated Engineering 🙂
Note: the assembly pictured above & below uses a different part number for the axles (Tamiya 9804380) which have slightly longer cups than the more widely available Tamiya 54076:
This alternative may be useful for mixing and matching the axles and dog bones for slightly different lengths, especially if you need to simulate an odd-sized (43mm, 45mm, 47mm, 49mm) shaft length (the stock TC6.1 swing shafts are 45mm center to center).
Ultimately the Tamiya 54076 axles and Tamiya 51092 46mm swing shafts were the best fit at all 4 corners for this particular setup. If you’re not spacing out the arms, but want to be able to switch out the wheel hexes to standards, use the Tamiya 54078 44mm swing shafts instead.
Axle Fit
The Associated CVA bone blades fit a little tight on the Tamiya pins. For the right fit, carefully drill out the holes using a #46 size bit (just over 2mm). A 3/32″ bit would likely work in a pinch but will have a little extra clearance.
Tamiya makes the dog bones for sizes 42mm, 44mm, 46mm, and 48mm so you should be able to find the right size to get things perfect.
Final Spacing
Once the axles are installed, you might have to adjust some things to accommodate the wider setup:
- Suspension arm mount location
- Shock tower mount location
- Camber link location
Of course once fully done you’ll want to re-adjust your droop, ride height and camber 😎
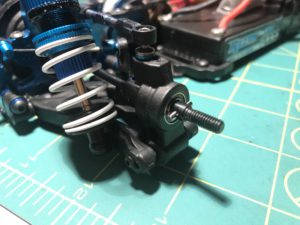
With the suspension arms buttoned up, insert the standard size wheel adapter pin. You won’t be able to add the M4 washer that normally goes between the wheel pin and the bearing, but that’s OK.
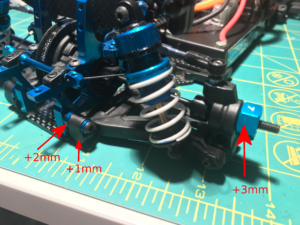
Let’s take a look at all the adjustments we made:
This nets +6mm on each side, +12mm in total. It’s a little overkill (202mm) – but the setup is now ready for quick and easy adjustment just with the wheel adapters. Sizes are readily available for 4mm-7mm. Other cool things you could potentially do with this setup is turn a TC6 into a rally car. With the extra wide bulkhead spacing you could really let the arms droop and add longer shocks. Don’t be afraid to get creative!
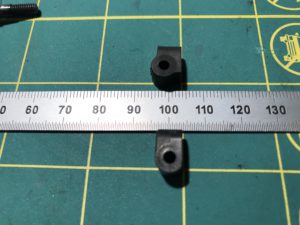
It looks like these RSD double-cardan axles would be a good alternative if you just want to switch to “normal” wheel hexes and won’t be widening things at the arms: http://www.reflexracing.net/RSD-AE-TC7-TC6-Dual-Cardan-Joint-with-Narrow-Axle-bearings-included_p_1120.html